 |
| Eye of Horus Glitter Tattoo |

Welcome to the blog for Tradewind Tiaras, Inc. We'll tell you all about our newest products, of course, but we'll also provide great wedding planning tips, showcase gorgeous weddings, and talk about our favorite vendors after 10 years in the business. Visit our main website at tradewindtiaras.com .
Showing posts with label Favors. Show all posts
Showing posts with label Favors. Show all posts
Wednesday, November 30, 2011
How to Do Your Own Glitter Tattoos
Looking for the DIY glitter tattoo tutorial? It's been moved to its new home at Tikkido.com!
Monday, October 31, 2011
DIY Project: How to Make Toadstool Colored Pencils
Looking for the tutorial on how to make these charming toadstool colored pencil favors? The DIY has moved (along with all the other content on the blog) to its new home at Tikkido. Here's the direct link.


Tuesday, October 4, 2011
DIY Project: How to Make Glitter Playdough
Looking for this? The blog has moved to Tikkido.com! Find the full tutorial over there, and join us for lots of creative new content.


Thursday, August 4, 2011
New Product: Chalkboard Wine Charms!
I just love creative uses for chalkboard paint. Love. Love love love.
Do you remember my post on the chalkboard labeled glasses?
And how awesome is this idea for a chalkboard table runner from Rock-ur-Party?

Or how about this amazing yet simple dessert table backdrop featured on the Amy Atlas blog?

Yep, I'm enchanted. So I was particularly pleased with myself when I came up with this new idea: wine charms made from natural stone that work just like a chalkboard.


Hooray, a fun chalkboard item that I created! I feel like I finally got to join the party. Already for sale on our Etsy store, and soon to be available on the tradewindtiaras.com website!
Do you remember my post on the chalkboard labeled glasses?
And how awesome is this idea for a chalkboard table runner from Rock-ur-Party?
Or how about this amazing yet simple dessert table backdrop featured on the Amy Atlas blog?

Yep, I'm enchanted. So I was particularly pleased with myself when I came up with this new idea: wine charms made from natural stone that work just like a chalkboard.


Hooray, a fun chalkboard item that I created! I feel like I finally got to join the party. Already for sale on our Etsy store, and soon to be available on the tradewindtiaras.com website!
Wednesday, July 13, 2011
Vegas Bound!
I'm heading to Vegas for a few days, to celebrate the 10th anniversary of one of my very best friends in true Vegas style. She's the inspiration behind the Elspeth tiara:

She's smart and funny and insightful and determined and kind and beautiful and strong and everything you could ever want in a friend. I can't wait to go spend a few days in Las Vegas with her, celebrating 10 years of her marriage, complete with an Elvis-officiated vow renewal.
I wanted to do a little something special for this very notable event, and I remembered the favors that they gave out at their wedding included a recipe card, with a favorite cookie recipe from each side of the family.
Scottish shortbread from the bride...

...and Biscochelos from the groom.

That's the original favor/recipe card from their wedding! It's had a place of honor in my recipe box these last ten years.

Just a little sweet treat to show that I cherish and remember that happy day, and am so delighted to be honoring these past ten years and looking forward to many more.

I hope they like it!
Monday, June 27, 2011
Fabulous Product: Rustic Muslin Favor Bags
Looking for all the details on where to get these awesome muslin favor bags (and many other cool products)? The post moved over to Tikkido.com.


Tuesday, May 31, 2011

Tuesday, May 24, 2011
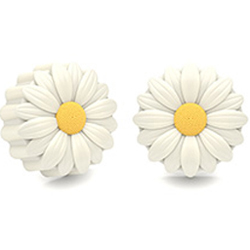
Fabulous Product: Daisy Shaped Chocolate Covered Oreo Mold
I'll get back to the butterfly party and tutorials tomorrow, but I just saw these and had to share!
I'm a huge fan of edible favors in general, and I just love this new product from Fancy Flours. A mold for making daisy-shaped chocolate covered Oreos!
 Delicious! Beautiful! Easy! Wouldn't these be a magnificent, easy, inexpensive DIY favor for a wedding or really any party? A gorgeous addition to any dessert table? These are so adorable they completely justify the ridiculous number of exclamation points I've used in this post. I really wish I'd had them for the butterfly party--though I would have had to figure out how to keep them from melting in our heat.
I'm a huge fan of edible favors in general, and I just love this new product from Fancy Flours. A mold for making daisy-shaped chocolate covered Oreos!
Thursday, May 5, 2011
Strawberry Picnic First Birthday
My youngest daughter, Niamh (say NEEV, it's Irish), is almost two years old! I'm in the last minute throes of party planning for her bash this Saturday, and realized that I wasn't yet blogging when she had her first birthday last year. So to build the anticipation for the coming event, I present Niamh's First Birthday--A Strawberry Picnic.


At that age, it's all about the parents, so we viewed the birthday as an excuse to have our friends over and decorate with a cute theme. I'd decorated Niamh's nursery in a Strawberry Picnic theme, so already had a number of good props to use, like the letters spelling out her name.


At that age, it's all about the parents, so we viewed the birthday as an excuse to have our friends over and decorate with a cute theme. I'd decorated Niamh's nursery in a Strawberry Picnic theme, so already had a number of good props to use, like the letters spelling out her name.

I built a wood-fired pizza oven in our backyard (while I was pregnant with Niamh, in fact), so we already had a number of red-checked tablecloths for when we entertain in Italian style. They were perfect for the picnic theme.
I was especially proud of the cake, and was very happy with how it turned out.

You can hardly even tell that it fell flat on its side while I was trying to take photographs earlier that morning!
This was actually the second time I've made this cake. The first time was about six years ago. I had never decorated a cake before, but my husband was on a business trip, and I saw the most gorgeous calico-fabric-inspired cake on the cover of Martha Stewart Weddings. I fell in love, and impulsively decided that I was going to make it. I went to the craft store, bought some tools, and started baking.
I was so proud of that first cake! I thought it looked amazing! And looking back at the pictures now, I cringe. It was awful. Really, really awful.

See? I told you! So getting to do this cake design, which I've always loved so much, over again felt like a chance at redemption. (Photography has obviously also improved over the past few years!)
Favors were homemade strawberry jam (made by me under the guidance of my jam-making friend Liz) and macarons (graciously made by my pastry-chef mother).


I made strawberry bunting out of felt, and tried my hand at floral arranging for the first time. I used strawberry baskets I bought off eBay for both the favors and the flowers. They were the perfect touch!


I also made a strawberry-shaped pinata for the kids. Thankfully, strawberries are pretty much balloon shaped. A little paint, glitter, and green crepe paper, and we had the perfect pinata. I should add glitter to all pinatas. It looked seriously awesome hanging there in the sun.


The weather here in Phoenix can be either gorgeous or wickedly hot in May. Of course, the weather crested 100 degrees for the party. I called all our guests, told them to bring bathing suits for the kids, and set up kiddie pools, sprinklers, and water balloons.

The adults got to sit in the shade with a misting fan--very effective!

Of course we made pizza in our WFO--that's what we always do when we feed a crowd. The pizzas cook in 90 seconds in that 900 degree oven!
And it wouldn't be a first birthday without a baby covered in cake.

The celebration continued long into the night, well after the birthday girl had been put to bed.

I can hardly believe she's already turning two! My entire dining room and kitchen are completely taken over with party prep for this celebration, and I cannot wait to share it with all of you.
Wednesday, March 9, 2011
How to Make Chocolate Popcorn
Looking for the DIY on making chocolate covered popcorn (or Troll Boogers for a Harry Potter Party)? It's moved, along with the rest of the blog, to its new home at Tikkido.com. Here's the direct link to the content you wanted!


Tuesday, January 4, 2011
A Sweet Way to Ask a Friend to be a Bridesmaid
So you're engaged, and there are a thousand and one things to coordinate and plan. One of the first things you should decide is who you'll ask to be in your bridal party. Sure, you could just call up your best friends, or ask them the next time you're together. But I just love this idea from Andrea of Ali's Sweet Treats:

They're based in Miami, but are happy to do business by mail order. Wouldn't you just love to get these delicious custom cookies as a (literally and figuratively) sweet way to be invited to be a bridesmaid?
As a related side note, I desperately want to throw a spy-themed party and give out the invitations as cookies--"This message will self destruct...as soon as you eat it." I just love the idea of cookie invitations!
They also make cookies for wedding and party favors, so be sure to check out their amazing gallery. Cookies like this castle make me, now firmly in my 30s, want to have a princess party!
Tuesday, November 30, 2010
Fabulous Products: Artistic Cookie Favors
I've already shown you some of the remarkable work done by Sabrina, the incredibly gifted owner of A Cake Dream, when I showed off her amazing Swarovski accented cake. But she does so much more. We've all seen cookie favors, but look at these (literal!) works of art.


A Cake Dream used the amazing artwork of the artist Karen Sloan of Wall Flower Studio to create these edible masterpieces.

Wouldn't those make absolutely gorgeous favors, or a fabulous addition to a dessert table? Are you using scrapbook paper to create some of your decor or invitations? How about a coordinating cookie?

And who could possibly resist these gorgeous chocolate-covered oreos?

Think beyond the cake when you're talking to your baker. I love consumable favors anyway, and these are truly spectacular examples of what can be done.
Wednesday, November 3, 2010
DIY Project: Homemade Hot Cocoa Favors
Looking for the homemade hot cocoa favor/gift tutorial? It's at its new home at Tikkido.com.
 |
| Homemade Cocoa Favor |
Monday, October 11, 2010
Favor Ideas: Homemade Caramels are Perfect for Fall and Winter
 |
| Homemade caramels from the Tradewind Confections kitchen. |
Caramel anything is good, in my opinion. Homemade caramel anything is spectacular, and homemade caramels make a fabulous fall or winter wedding favor.
Never made candies before? Don't worry--this is a pretty darn easy recipe to follow, great for a first-timer.
One batch makes approximately 100 perfect bite-sized caramels. I say approximately because I didn't count the irresistible caramels that my daughter and I sampled. Quality control is, you know, important and stuff. Yeah.
How To Make Fleur de Sel Caramels (Sea Salt Caramels)
Ingredients:
1 cup heavy cream
5 tablespoons unsalted butter, cut into pieces
1 teaspoon salt
1 1/2 cups sugar
1/4 cup light corn syrup
1/4 cup water
1 teaspoon vanilla
1/2 teaspoon vinegar or lemon juice
sea salt to taste, for sprinkling on top of the caramels.
Directions:
In a small saucepan, bring butter, cream, and the teaspoon of salt to a boil. Remove from heat and set aside.
Boil sugar, water, and corn syrup in a second, good sized (4 quart-ish) pot. Stir frequently until the sugar is dissolved. Once the sugar is dissolved, stop stirring! Gently swirl the pan until the ingredients turn a light golden caramel color. Watch carefully--this happens quickly!
Carefully stir the cream mixture into the sugar mixture. It will bubble up impressively, but don't worry! That's why we used a biggish pot. Keep stirring until the mixture reaches 245 on a candy thermometer. Remove from heat, and quickly stir in the vanilla and vinegar (or lemon juice).
Pour into an 8x8 pan. Here's my secret weapon in caramel-making. See this blue pan here:

That's a silicone pan. I don't use them for much, but for bar cookies and caramels, they're absolutely brilliant! If you don't use a silicone pan, you'll need to line your pan with parchment paper, butter or oil the parchment paper and pan, and then cross your fingers and hope hope hope the caramels come out of the pan. If you use a silicone pan, no stress, no worries, it just works. No parchment or oiling or pan prep of any kind necessary.
Let the caramels cool for about five minutes. Sprinkle with sea salt, if desired. It's not necessary, but I love that burst of salt with the silky-sweet caramel. Yum! If you sprinkle the salt too early, it will dissolve into the surface. Too late, and it won't stick.
Let the caramels cool for at least two hours, then turn them out on a cutting board.

Cut into pieces. You can use a knife, or kitchen scissors. Both work, but I usually grab the scissors, myself. One word of advice--don't turn out the caramels and then leave them sitting on the cutting board for an hour or so. It will meld to the board and stick with a force heretofore unknown outside of the superglue testing labs.
Wrap the pieces in squares of waxed paper. You can also buy commercial candy wrappers, but I've had sticking issues with those, and I love the classic, old-fashioned, homemade look of the waxed paper.
There you go! I'm a big fan of edible favors anyway, but I would be so delighted to get this as a favor at any wedding I attend! It's inexpensive, delicious, and so special to give something homemade. Plus, you can make these several weeks ahead of time, unlike cookies! Fair warning, though--it might be hard to keep from eating them all in those weeks before the wedding. They're that good.
Friday, September 24, 2010
Edible Favors = Favors Worth Giving
Jillian over at the Catch My Party blog recently posted about edible favors, and I agree completely with everything she says. I've been a big fan of consumable favors since I started planning my wedding 11 years ago, and started considering favors for the first time.
I've been to a lot of weddings over the years, and seldom do I have any inclination to keep the favor, no matter how big and extravagant the wedding is.
The teas, the sweetly packaged candies, the jams, the herb seeds, however...those were used and enjoyed, and brought sweet memories of the weddings and showers they came from. That's exactly what a favor should do.
Whenever I have an occasion to give favors, I typically choose edible favors. From my daughter's first birthday party this year, homemade strawberry jam and macarons:


Take a look at these adorable honey favors from a Queen Bee Birthday party, courtesy of No Fuss Fabulous. While you're there, check out the rest of the party. Every detail is as exquisitely thought out and presented as the favors.

Not feeling up to a big DIY project? There are great options available for purchase online.
How about these custom-labeled olive oil and vinegars from Beau Coup Fine Favors?

Or these adorable maple syrup jars, also from Beau Coup:

Don't want to give food? How about these charming basil seed favors from Go Green Eco Favors and Gifts:

A consumable favor can be found to fit any theme out there, and is a great opportunity for an easy, thoughtful DIY project for your wedding. And it's less likely to end up in the next garage sale.
Subscribe to:
Posts (Atom)